Here you can find past demo days at Liberty Craft
Fabulous Florals
Gosh it's Thursday again already where do the weeks go? Today at Liberty Craft I've been using more of the new season's stamps from Woodware & this week looking at the lovely floral designs from Jane Gill. Let me talk you through what I did.

 |
| This is JSS470 Whimsical Flower - Mary Jane. I stamped the image first & then masked it using Stix2's very useful masking sheet. I then placed a Dutch Doobadoo mask "Chicken Wire" over the top & applied some Peeled Paint Distress ink. I removed the mask from the image & coloured with Sakura Koi pens. |
 |
| This is one of Jane's new Bubble Bloom designs & this one is "Lilly" (JGS480). I paper pieced the leaves & petals of the flower using papers from some of the Perfect Prints pads & then I added some Card Candis, Stickles & Liquid Pearls. |
 |
| Lastly this is another of the Whimsicals- JGS471 Babs. For this I've paper pieced the whole thing & added some shading with the Koi pens. |
New from Woodware
Its always an exciting time when the new season's stamps from woodware are released & today for my usual Thursday morning demo at Liberty craft I've been having a play with some of them. There are some lovely designs at always lots for Christmas as well as plenty for other occasions too. Here's what i did although I only managed the 2 today as I got quite absorbed in using my coloured pencils on the fab new butterfly stamps.


Here I've used FRS618 Love Collage stamped with black Versafine for the background on the card blank. The butterflies come from JGS483 Butterflies & I've coloured with pencils & added some Stickles for sparkle.

For my second card I've used FRS022 Love Elements. The birds have been embossed with white & silver powders & then lightly sponged over with Versamagic inks (resist technique). This is a lovely romantic set which would be suitable for weddings, engagements & anniversaries.
Using Distress Inks
For today's demo at Liberty Craft Exmouth I've been playing with my very favourite inkpads Distress inks from Ranger. They are great for all kinds of techniques including stencilling, creating backgrounds, colouring & sponging. I've used them today with embossing folders & Woodware stamps.


A Sheena Douglas embossing folder softly sponged with a "Smoothy" ink dauber.

Woodware's "Into the Woods" & a Doobadoo stencil.

"Memories" from Woodware with a Clearscraps mask.

"Into the Woods" again stamped onto a background which had just been swiped with a mix of pads. The background is a piece made with the embossing folder & wax paper technique.
Colour Blocks
Today for my demo at Liberty Craft Exmouth I've been creating designs using the colour block method & although I say so myself I came up with some pleasing results. I die cut various shapes using Stix2 "Mount & Stamp Foam" to create my own solid stamps. I used Distress inkpads to print the solid shapes & then stamped over the top with a variety of Woodware stamps in Versafine black. This method works best with silhouette stamps but I've also used outline stamps & filled them in with a black Sakura Koi pen. Hope you like the results.


Vellum Flowers

Today for my usual Thursday morning demo at Liberty Craft Exmouth I've been creating pretty vellum flowers using white embossing powder & Woodware stamps. I think it's been a quest today to see how many designs I could get out of one 12 x 12 sheet of coloured vellum! Here are the results......
 |
| Whimsical Flower- Daisy May |
 |
| Another from the "Whimsical" series this time Sally Anne |
 |
| One of my very favourites from this spring's collection Marguerite Patch |
 |
| Finally "Flowers in a Row" on a piece of torn vellum. The thing to remember when working with vellum is to be aware how you are going to attach your design to the card blank as most adhesives will show through. On my designs above I've used glue dots on the flower heads of the first design or you can wrap the strip of vellum around the card as I have done with the one above. Other methods include the use of brads & disguising the adhesive with a punched shape, Candis or perhaps ribbon. Always wipe vellum with an anti stat bag before embossing to help prevent "speckling" & I've done some dry embossing on the rear of the image using a molding mat & ball tools. This will whiten the vellum & add some shaping & sculpting too. I've added some lilac Liquid Pearls to highlight the flowers but you could also add some colour to the reverse of the image with water based pens. I had intended to do this but it would have helped if I had brought my wallet of pens!! But that's another day another demo!! |
Punch Craft Animals
For today's demo at Liberty Craft I've been experimenting with punches to create cute animals. It's amazing how many can be created with a little imagination! Here's what I did.....

 |
| 3 circle punches, a heart punch & of course the mini butterfly. The sentiment comes from Woodware's "Little Messages" & I've cut some some "grass" free hand. Cute eh? |
 |
| Here we have a ladybug again 2 circle punches & an office punch for the spots. Add some "googly" eyes & a stamped background. |
 |
| Lastly I've used a small teardrop punch for the body & wings of the bees & there's a explanation of how the strawberries were made in the previous post. The message comes from Woodware's "A Touch of Humour" |
Embossing Basics
It was a funny kind of morning at my demo at Liberty Craft today & I'm afraid I didn't really strain myself today......well actually I did!! I managed to bring a cold back with me from holiday (unhealthy places, planes!) & I sneezed this morning & pulled a muscle in my back- ouch!! I'm now doing a Quasimodo impression! To top that the gas board came along & started to dig up the road outside Liberty Craft, very noisily with a pneumatic drill! Chaos rained & we all got wet!! So I wasn't firing on all cylinders, excuses, excuses!! I also thought that I was doing "Embossing Basics" when I should have been doing a "Hobby" week.Hey ho, perhaps I need a holiday! Anyway here's what I did manage....

 |
| "Flowers in a Row" with white embossing on Craft card. I've coloured with water colour pencils fro a stronger effect. |
 |
| "Meadow Flowers" & "Old Letter" embossed onto bronze pearl card with Jewel Gold embossing powder. I've added some colour with Distress Markers which hasn't shown up too well in the photo. |
Aperture Cards
I'm quite chuffed with the results from my demo at Liberty Craft today. I firstly die cut the aperture with a variety of different shaped dies & then partly filled the aperture with punched flowers & hearts. Quite simple really you just need to overlap the punched shapes & glue them one to the other. I think the design below would be lovely for a wedding card.
Hearts & Flowers

Hearts & Ovals

Flowers & flowers

More Brusho designs
Today at Liberty Craft for my usual Thursday morning demo I've been playing with Brushos & doing some watercolouring & spritzing. I was using some great stamps from Woodware which worked well with the Brushos & I've used a script stamp ( Old Letter) with Distress Inks to stamp over the top. Here's what I did.
 |
| "Wire Roses" by Francoise Read |
 |
| "Iris Stem" by Jane Gill |
Make &Take
Today at Liberty Craft we had a fun Make &Take morning with a Peek a Boo design. Unfortunately I omitted to take a pic of the stamped design under the white slider so ....duh! Sorry! But it was a fun morning even so!

 |
| Better late than never! |
More Mechanics
Hi all hope you've had a good day! Firstly I have to apologise as I didn't get too much done today in my usual Thursday morning demo at Liberty Craft. I was chatting too much about forthcoming workshops & the great new products which I shall be demonstrating soon from Stix2 in conjunction with the new season's stamp designs from Woodware- all very exciting!! Anyway here are the designs that I did come up with.
 |
| Here we have a "pop out presents" design which is very easy to do. Just fold a piece of card in half which will fit inside the card blank& cut 2 slits the same size to form gifts. You need 3 different sized ones & then cover with papers to gift wrap the presents. The printing on the edges of the purple card come from one of Woodwares "Tiddlers" "Birthday Textbox" which I have also used on the outside of the card blank for the background. |
 |
| The sentiment is "For You" by Francoise Read |
& is also featured in the card below.
 |
| I'm not going to tell you much about my last design as it will feature in my Woodware blog post this week so read all about it then but I did want to take the opportunity of showing my usual crafty ladies how to do the folds involved. |
Embossing Folders
It's Thursday again already & demo day at Liberty Craft. Today I've been playing with a few different ideas using embossing folders. Here's what I came up with.
 |
| I've printed onto the page of an old book, coloured with brush markers & then run the whole thing through an embossing folder. The stamp is "Daisy Bird" from Woodware. |
 |
| This effect was achieved by embossing a piece of wax paper. Place between 2 pieces of glossy card, sandwich in pad of kitchen foil & then iron on a soft surface like a folded towel. The wax transfers the pattern from the folder to the card. Now either brayer or ink dust with dye inkpads- I used Distress inks. |
 |
| Lastly this is a very simple design using 4 different folders & flat white card. I've used a 3" square punch & the sentiment comes from JGS324 "In the Frame Ditties" |
Making Embellishments
Today for my usual Thursday morning demo at Liberty Craft I was looking at making embellishments. Here's what I did.
 |
| Here I've made some "magnifying" spots by punching some circles from lightweight acetate &coating with Glossy Accents. They have to be left to dry for at least 24 hours but provide areas of interest to your designs. The stamp set here is "Into the Woods " by Woodware’s Jane Gill, |
 |
| For the embellishments here I've taken some buttons which have a ridge around the edge punched some pretty papers , added another punched shape, gem or Candi &filled with Glossy Accents. Both the next 2 sentiments come from "For You" by Woodware’s Francoise Read |
 |
| Lastly some paper flowers. Take a suitable stamp layer about 4 pieces of toilet tissue together, spritz with water &press firmly over the surface of the stamp making sure to press into all the nooks & crannies. Remove carefully &set aside to dry. You can sponge lightly with inkpads or colour with brush markers or if you prefer you can colour with ink before you spritz the paper. You can cut out the flowers or carefully tear around the edges for a ragged look. Add some buttons & some twine for the centres |
Brushos & Bleach Make & Take
It was Brushos & bleach Make &Take day today at Liberty Craft. Using Woodware’s peel off Chrysanthemum & Sakura Koi water brush pens to highlight bleached areas. A fun morning a great results ladies!


New Woodware Season
Today at Liberty Craft I've been using some of the great new season's stamps from Woodware. I've used Versafine Onyx Black to stamp & Sakura Koi water brush pens to colour. Here's what I did.

 |
| FRS617 Time to Wine Down by Francoise Read. Here I've added Glossy Accents to the glasses, bottles & grapes. |
 |
| JGS442 Saucer Flowers by Jane Gill |
 |
| FRS010 Marguerite Patch by Francoise Read. Paper pieced with papers from the dotty Perfect Prints pads. |
 |
| FRS609 Graffiti Star by Francoise Read just coloured & add some faux stitching. |
Using Brushmarkers for Stamping

Hi everyone hope you've had a good week- gosh I think winter is upon us at last! For my demo today at Liberty Craft I've gone back to a fairly basic technique & that is to apply colour straight from water based pens onto the stamp. This works better on solid or silhouette stamps & you may have to "huff" onto the stamp after you have applied the pens to re hydrate them. This method can produce some very pleasing results. Let me talk you through what I've been doing.
 |
| Here we have one of the brand new season's stamps from Woodware "Into the Woods" designed by Jane Gill. I've taken 2 die cut labels & printed on both & onto the DL card blank. I've used Sakura Koi water brush pens for all the designs today. |
 |
| This was a happy accident! I just printed what was left on the stamp onto a card blank & added a sentiment (JGS379 Everyday Verse) |
 |
| Here we have JGS381 "Flower Head Selection" which I've printed onto some punched squares. The background paper is from a Perfect Prints pad. |
 |
| The set I've used here is "Plant a Meadow" by Jane Gill. Printed onto a panel of card & then repeat the stamping onto the DL card blank. |
 |
| Finally I've masked the centre of the card with a punched circle & stamped all around the edges using "Flower Head Selection" again. The sentiment this time comes from "A Touch of Humour" by Jane Gill. |
Brusho Techniques
It was lovely to be back in my usual Thursday morning slot at Liberty Craft today & guess what! I was playing with Brushos again!! It was a chance to demonstrate some of the different techniques I've been exploring over the last few days. Here's what I did.

 |
| For this background I used glossy card sprinkled with Brusho powders & then sprayed with surgical spirit. As you can see you get a much more controlled effect with more pin pricks of colour. I over stamped with "Plant a Meadow" from Woodware using Versafine which I then embossed with detail clear powder. |
 |
| Here's one of my favourites. The background was created with glossy card again sprinkled & sprayed & then a scrunched up piece of cling film was placed over the wet area pressed down gently & left to dry . You get some lovely "cracked ice" effects. The stamping comes from JGS381 Flower Head Selection from Woodware, stamped & embossed as before. |
 |
| Here I created the background with a mask (Clearscraps Swirls). Place the mask onto some plain flat white card, sprinkle the Brushos on top & spray lightly as you don't want the paint to flow under the mask. Then remove carefully & allow to dry. The stamp used is FRS194 Just For You & I've "Brushoed" the paper flowers to match. |
 |
| Lastly, this background was created using the spray starch technique. Again on glossy card sprinkle the Brushos & then spray with spray starch. You will see the powder fizz & bubble & then I left it to it's own devices to run over the surface of the card & dry. As you can see you get some lovely effects. The stamp set is Flower Head Selection. Sorry about the wonky photography! Next week I shall be going back to basics by using just brush markers to colour the stamps before printing- quite a nice technique which tends to get overlooked. |
Masking Techniques
For my Thursday demo today at Liberty Craft I've been using 2 types of masking techniques with some lovely flowery Woodware stamps. Here's what I came up with

 |
| Here I've used JGS187 "Fiona" & made a mask using Stix2 Masking sheet. This has a low tack adhesive back so that it's easy to remove the mask from the image & build up your design. I've coloured all the designs with Sakura Koi waterbrush pens. The sentiment on all designs comes from JGCL575 "Delightful Verse. |
 |
| Here we have JGS411 "Curly Sue". Here I've taken a punches circle & used it to mask a circular area at the centre of the card while I stamped the image around the edges. After removing the mask I stamped the sentiment in the centre. I covered all the "bubbles" with Glossy Accents. |
 |
Here we have JGS409 "Floral Vine" & I have employed the same technique as before by masking the centre of the card blank.
I've also added the designs I did last week as I didn't get time to blog them so here's the Christmas Decoupage I did last week.    Hope you can join me next week when I shall be using Brushos- now on sale at
Liberty Craft.
33 Exeter Road
Exmouth EX8 1PT
01395 273238
libertycraft33@yahoo.co.uk
Christmas for Kids |
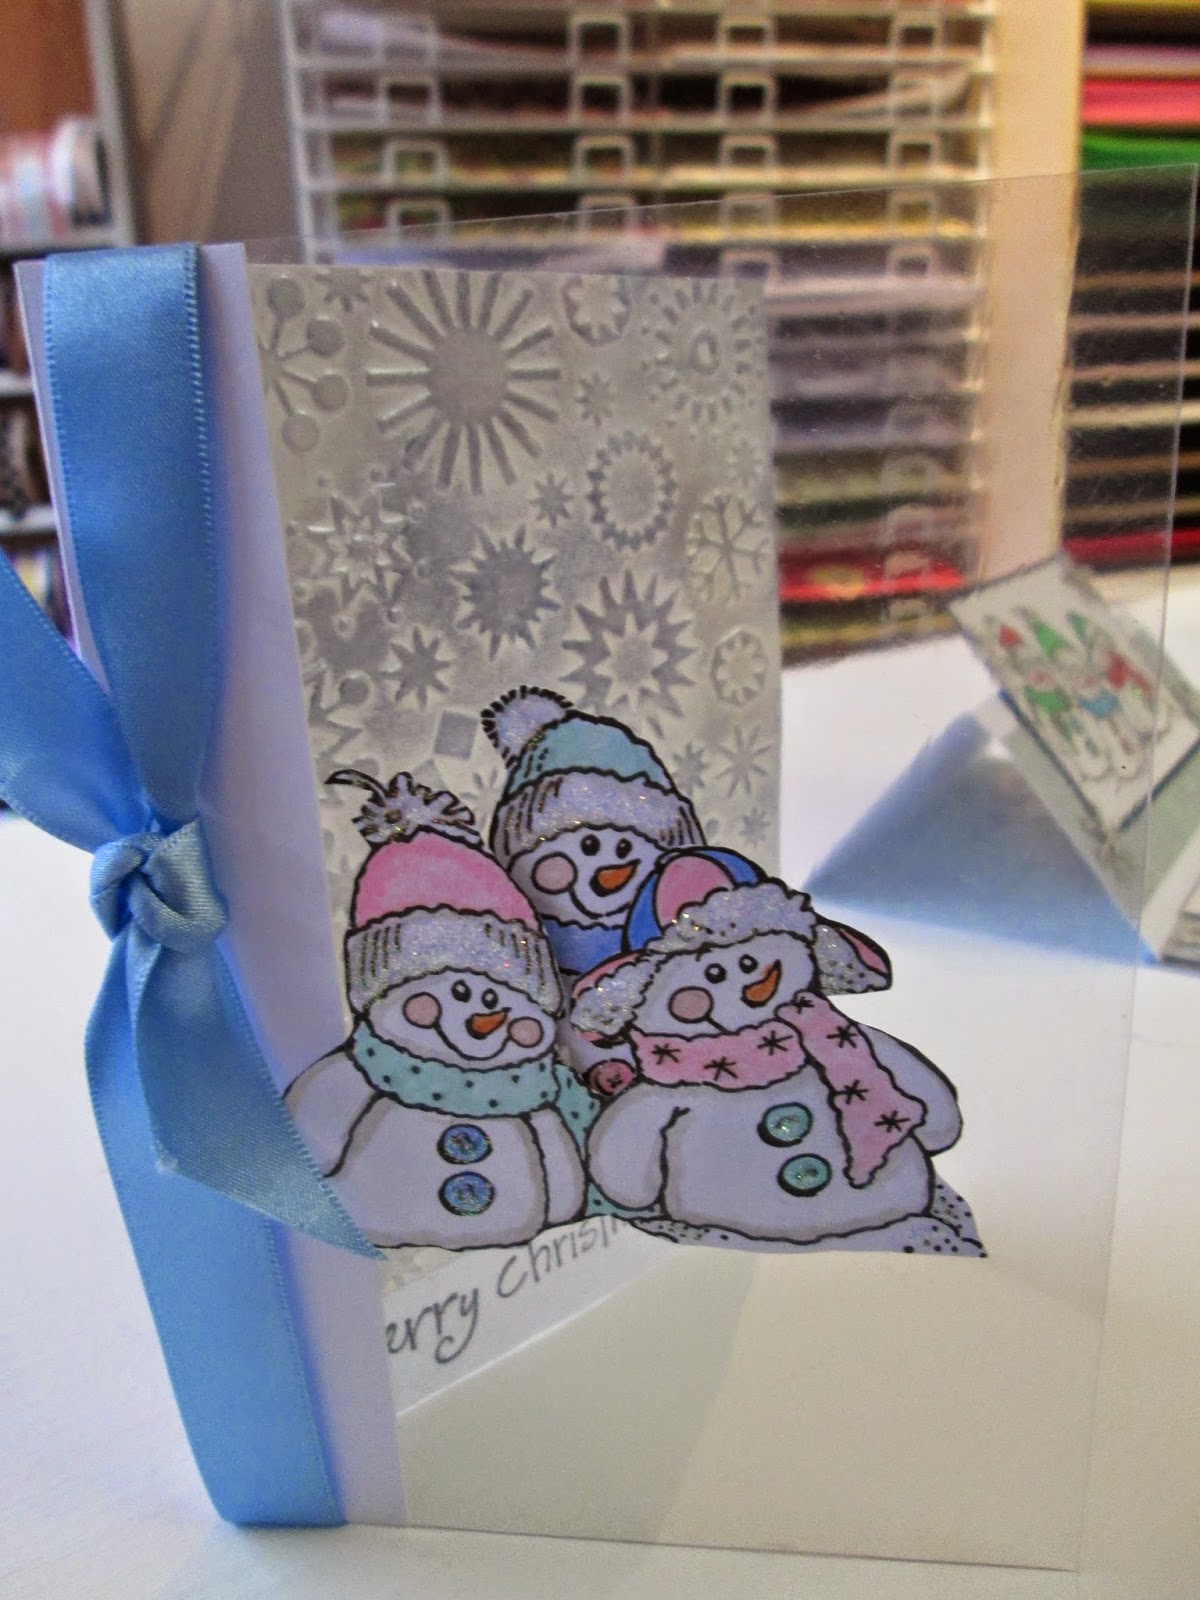
Hi everyone it's Thursday again!! As well as being my Woodware blog post day it's also demo time at Liberty Craft. Today I've been making pocket cards with Christmas fast approaching, for that gift voucher, photo or just an extra greeting. Below the pockets were made from a piece of A4 folded paper (Sarah has some samples if you want to see how to) which has been mounted onto a 5"x 7" card blank. I've sponged with Brilliance inkpads & Woodware the stamp sets used are "Christmas Trees" & "Christmas Cheer". I've coloured with Sakura Koi pens.

This week for my weekly demo at Liberty Craft I was looking at cards for kids (or the young at heart!). I was using a trilogy of stamps designed by Woodware's Jane Gill:- JGS101 Snowman,JGS102 Rudolf & JGS100 Jolly Santa. I've water coloured the images using the Sakura Koi water brush pens & added Stix2 clear beads using the Hot Melt glue gun. This really gives you a textured 3D effect. I've also added some berry embellishments using the glue gun & Stix2 fine glitter.All the designs were mounted onto craft card blanks & Woodware Christmas peel offs added for the greetings.
  
I hope you'll be able to join me next week when I shall be doing some Christmas decoupage using stamps.
Pocket Cards

  | ||
| Here we have another outing for "Trio of Trees" from Woodware. Embossed onto pink card from one of the Textura pads I've given a little colour to the baubles with a coloured pencil & highlighted with Stardust Stickles. |

 | ||
| Here's "Fluffy Robin" again embossed onto hairy manilla card & coloured with pencils. The border comes from a Stix2 "Bee'd Seed & Fine Glitter" pack. Christmas with a Punch
Gosh don't Thursdays come along quickly?! Today at Liberty Craft I've been using Woodware punches to enhance Christmas designs. Here's what I did:-
 
That's all for the next 3 weeks now I'm off on my hols soon & I'll see you again at Liberty Craft on Thursday 15th October when I shall be exploring white embossing. Hasta La Vista
|

Christmas Candis
You can make some really pretty flowers from Card Candis something I hadn't done for a while & I'd forgotten how much I like them. Usually I start on a punched circle of card as it gives you a base to work on & I always arrange the components of the flower into a blob of silicone glue . There are various flowers to make & each one needs a difference technique to form the petals from the Candi & different positioning to make the flower. Here's what I did:-
 |
| Here we have 2 layers which form the flower so that it is fairly flat. The central Candi has been sculpted with a ball tool so that it forms a cup rather than a dome shape. The petals are formed as for the rose for the inner circle & just folded in half with the right side upper most for the outer circle. |
 |
| this is a simple little flower which is called "Star of David" & it's my favourite. This sits on a small circle & the petals are twisted right around a pair of tweezers & then slightly opened out again. Arranged in a star shape with the centre left open to receive a blob of Stickles. |
To see a great tutorial on Candi flowers click here You Tube & type Card Candi Flowers by Craftworks cards in the search box. You should get a guy called Neil Burley who is one of their design team. See you next week at Liberty Craft when I'll be doing Christmas with a punch!!
Autumnal Designs
We were looking at Autumnal looks today for my usual Thursday morning at Liberty Craft using some of the new season's stamps from Woodware. Here's what I came up with:-
 |
| Here I've used Bubble Bloom "Curly Sue" (JGS411) by Jane Gill. I've stamped onto a piece of background which I found in my stash from my March workshop. It was made by applying ink from a Kaliadacolor inkpad onto an acrylic block & stamping onto card.I stamped the image with Versafine & added some colour with Sakura Koi water brushes. I added some hot glue to the bubbles using the Stix2 glue gun & then added some micro beads from a Stix2 Seed Bee'd & Glitter set. |
 |
| Here we have "Woodland Bird" JGS406 by Jane Gill. First I gave a piece of card the "direct to paper" treatment using some Colorbox chalk inkpads & then I stamped the image using Brilliance black.I just added a little colour to a few areas of the image with some coloured pencils. |
 | ||||||||
| Finally I did a quick card using "Doodle Daisies" (FRS405) & "Going Around in Circles" (JGS405) I stamped the flowers onto paper from Perfect Prints pad Dark dots & cut them out. I stamped the leaves onto the card blank & added some colour with the Koi pens.The flower centres were made by running some circles of hot glue onto a hot sheet & stamping one of the circle stamps into it. Allow to cool for a few minutes & then remove the stamp. I then dusted the centres with Metallic FX. Christmas with Inkylicious
The Christmas fest continues this week at Liberty Craft with some yummy stamps from Inkylicious. These are what I call "grown up's" stamps with intricate detail & excellent stamping results. Here's what I did:-

|


It was nice to be back at my regular Liberty Craft Thursday demo although I had a great time last week at the Stix2Anything/Woodware demonstrators training day. I came back full of new ideas & great new products for Christmas. Below are some of the new season's Christmas stamps from Woodware with some of the great techniques I learned as well.
 |
| FRS292 Christmas Trees. This has been stamped onto the card blank,coloured, masked & a background applied direct from 2 inkpads. The trees were then covered with a adhesive Sparkly acetate from Stix2. |
 |
| Same stamp again but this time using the negative of the mask & some inks brushed over the top. Then add some colouring for contrast. |
 |
| FRS291 Christmas Bells. Stamped onto some card which had been given the "direct to paper" treatment & coloured with Sakura Koi Coloring Brush pens. I then added a textured border using a Stix2 Seed & Bee'd & fine glitter set with Ultra sticky tape. |
 | ||||
| Finally we have FRS331 Peaceful Christmas. simply stamped & coloured. I then added a circle of punched DSA sheet to the flame. I cut around the flame & part of the outer circle with a craft knife & applied some gold Transfer foil to the exposed sticky area. When that was done I covered the rest of the sticky with crystal glitter. I used the Layer Perfect (from Stix2) to create a perfect red layer for my image. Go to www.stix2.co.uk & check out the video library to see how to use the Layer perfect for all kinds of craftiness. Lastly for the holly berries (& the balls on the "Christmas Bells") I used my Stix2 hot glue gun & fine glitter. That's it for this week I'm off to the wilds of Cambridge for the weekend! Join me next week when I shall be having an "Inkylicious" Christmas! HouseMouse
Gosh how quickly Thursday comes around! This week at Liberty Craft we've been playing with Stampendous' HouseMouse designs. I love the fine detail on these stamps & to me they need nothing more than printing with Versafine inks & soft colouring with pencils.
|


Enamelling
Today's demo at Liberty Craft was all about enamelling techniques, something I hadn't done for a while but thoroughly enjoyed getting back to. There are some basics you need to remember when approaching enamelling:-
1. Always use mount board or very thick cardboard or even wooden shapes.
2. Always avoid using anything wet i.e colour with pencils not marker pens, inks or paints. Never use a wet glue to attach the finished piece to your design. Anything wet will cause the enamel layer to deteriorate & "sweat". Use DSA tape.
3. For best results use UTEE (ultra thick embossing enamel).
Here are today's results.

 |
| This little chap was a pre cut cardboard shape. I gave it a coat of UTEE to start with followed by a patchy coat of Stampendous Frantage Aged Teal embossing powder. Lastly I coated it again with UTEE & sprinkled on some Detail copper powder & a little crystal glitter too. After heating & while the enamel was still molten I placed the stamp into it to obtain the textured effect which you can see in the photo below. |

 |
| Here I've stamped with part of FRS319 "Happy Tiles" coloured with pencils & enamelled 3 coats of UTEE for a good, hard, glossy finish. The sentiment comes from JGCL570 "Something to Say" |
 |
| A more delicate look here. The stamp is Inkylicious "Home is Where". I've done some random background colouring with 3 shades of pencils before stamping the sentiment with Brilliance Graphite black. I have used 3 coats of UTEE as before but I sprinkled a little silver embossing powder around the edges of the message before heating the last layer. Some punched flowers finish the design. |
 |
| The stamp here is FRS188 "Make Time". I've stamped onto smaller pieces of mount board & trimmed to fit the stamped image.This has been printed onto a piece from a Textura paper pad (Nature). After the enamelling process I have attached the pieces with DS tape. Hope you've enjoyed today's demo don't forget to join me next week when I shall be using "Housemouse" stamps- so cute & pretty! |
Acetate
Another Thursday- another demo! Today I've been using acetate for various effects. Below are the designs I came up with so I'll talk you through each one.

 . . |
| Here I've used the Stix2 A4 Extra Thick acetate to make my card blank.Just score well & make a good crease. I've used a Perfect Prints paper for the inside of the card & Bubble Butterfly peel off for the outside. I've used some Sakura Stardust pens & Candis to fill the butterflies. The sentiment which has been stamped on the inside paper is from JGCL569 "Delightful Verse". Always be careful when making an acetate card that it looks neat from the inside too & you will need to hide any DS tape or glue. |
 |
With of both these designs I've used some of the Stix2 Project acetate which was treated with Dreamweaver Alcohol inks. I've passed it through an embossing folder & made "windows" with a Woodware square punch. The peel off has been coloured with Sakura pens. The ribbon on the card below I must have inked at some point & abandoned but it was perfect for this project.
|

That's all for now hope to see you next week when I shall be enamelling!
Working from Sketches
It's been a while since I said "Today at Liberty Craft" what with holidays & my Stix2 Anything & Woodware demo on Saturday. Today I've been working from Sketches which are pre designed layouts or patterns for you to base your card around. There are no hard rules, you can turn the sketch any which way you prefer use ribbon for a border, any colours, any techniques. I've cheated here (what me?! surely not!!) & used some past sketches from the Woodware designers blog back in the mists of time. Here's what I did & the original sketch.
 |
| JGS390 Bubble Bloom "Carol" coloured with Sakura Gelly glaze pens & teamed with Perfect Prints & Textura paper pads |

 |
| JGS326 Delicate Daisies coloured with Sakura pencils & also teamed with Perfect Prints & Textura pads. |

 |
| Bubble Bloom "Carol" again this time but punched into circles with a 2" punch & Candis to finish it off. The sentiment comes from JGS379 Everyday Verse. 
Hope to see you next week when I shall be doing things with acetate. Bye for now!
|
Colorcore & Embossing folders
For my usual Thursday morning demo at Liberty Craft I've been playing with some Colorcore 12 x 12 papers & some brand new embossing folders by Sheena Douglas (Crafters Companion). Colorcore papers are black on one side & come in a range of pretty colours for the other side. Just run them through your embossing machine with the chosen folder (make sure it's black side up) & then sand off the black side to reveal the pastel colour. Simples! You can create a background, some punched shapes to combine with a sentiment or create a whole scene as I have with the "Trees". The sentiments come from Woodware's JGCL "Something to Say" & JGCL569 "Inspirational Verse".


Don't forget that there won't be any demo for the next 3 Thursdays as I'm off to the sun. Hope to see you at my all day demo for Stix2 & Woodware on Saturday 4th July when I will be playing with all sorts of goodies- can't wait! Bye for now!
Pop up cards
It's demo time again at Liberty Craft & today I've been using the Build a Bouquet trio of products from Stampendous. Those of you who follow this blog or pop in to my demos will have seen me use the Build a Bouquet stamps & now there is a die set to go with them to save all that boring cutting out & also a "Pop Up" set of dies which will die cut the base for any pop up design.This set also comes with some lovely edging dies & 2 sets of plaques in varying sizes ready for your sentiments. So below here are the results of my morning's labour.

Here's the outside of the card when closed & both the sentiments come from JGCL570 "Something to Say"

Join me next week at Liberty Craft when I shall be using
the Core' dinations "Core Colour" papers
Resist Techniques
Resist Techniques
For my demo today at Liberty Craft I have been looking at various resist techniques which can produce some lovely results. I've been using some of the Inkylicious designs which I used last week plus some Woodware favourites too. Here's what I did.
 |
| "Wheat" from Woodware with black embossing onto glossy card & sponging with Distress Inks. |
 |
| "Wing & Things" & "Home is Where" stamped with Versamark & dusted with chalks |
 |
| "Daisy Fields" White embossing on glossy card & sponging with Distress Inks. |
 |
| "Plant a Meadow" stamped with Versamark & dusted with Metallic FX pearl powders Join me next week when I shall be making pop up cards with the Stampendous stamp & die sets "Build a Bouquet" Inkylicious |
I've had a great time today in my usual Thursday morning demo at Liberty Craft using the lovely stamps from Inkylicious which are new to Sarah. I colour washed some water colour paper with distress inks to make the backgrounds. This works well with the largely silhouette designs. The sentiments come from Woodware's "Tiddlers". Here's the array of designs which I created.

 |
| "Picture Perfect" |
 |
| "Daisy Fields" |

 |
"Wings & Things" & "Raindrops"
|
Yesterday at Liberty Craft I was demonstrating the art of the "double display" design.Those of you who visit my blog from time to time will remember that I featured this idea last week in the "Inspired by Pinterest" theme. This also is what I shall be covering in the next workshop on 6th June along with a diamond fold card so if you would like to be shown "how to" book your place.
I used the Stampendous stamp set "Build a Bouquet" but with very different colours this time. I didn't actually get to finish as I had a lunch date with an old friend yesterday so I had to do some homework but here is the finished design which will be on display at Liberty Craft soon.

Please join me next week when I shall be using the new Inkylicious stamps recently new to Liberty Craft & they are gorgeous!!
Stamping on Fabric & Felt
Today for my demo at Liberty Craft I have been stamping on fabric which I touched on a few weeks ago for a Woodware blog theme; Mother's Day- a card for a special lady.I've also been using felt which is fun & tactile & brings dimension to your designs. For both designs I've used "Doodle a Flower" from Francoise Read which I also used in our Spring workshop a few weeks ago. When working with felt there are a few things to remember. Print with Versacraft which is designed for use with fabric but also requires to be heat set. For the purposes of my demo today I lightly used a heat tool but at home I recommend you use an iron. Also be sure to stamp on a foam "pricking" mat which allows you to stamp deeper into the felt & also to let the stamp remain in position for a few seconds to allow the ink to transfer to the felt. Now you can heat set before cutting out the petals & leaves. I added a button for the centre of the flower & a few dots of Liquid Pearls which as you can see sits nicely on the surface of the felt & looks like tiny beads. The sentiment comes from JGS324 In the Frame Ditties.

Here's where the fabric comes in! I've used some material from some "fat quarters" which are normally used in patchwork but perfect for this. I stuck a piece of DSA (double sided adhesive) sheet onto a piece of toning paper before removing the other sheet from the sticky surface & placing the material on the top. This gives the flower more body & stops any fraying of the material too. You can also give the petals some light character with a ball tool. Press down firmly. I used Brilliance Graphite Black for stamping this design & stamped the flowers as a whole from individual petals. Cut out & add to the design with 3D foam tape. Add buttons to the centres of the flowers & as an embellishment.

That's all for this week but hope to see you at Liberty Craft next week when I shall be doing some more "mechanical" designs namely "Double Display" cards.
Double Easel Designs
For today's demo at Liberty Craft I've not only been making double easel cards but I also got the chance to play with the new Inkylicious stamps which Sarah now has in stock. They are what I call real grown up's stamps with beautiful flowers, foliage, scenes & sentiments. Many of the stamp designs are silhouettes & the outline stamps have very fine detail.
For the mechanics of the cards I have used a 6" x 6" card blank as the base & inside there is a 4" x 4" which sits inside & acts as the stopper for the larger design. The sets used here are "Wings & Things" & the sentiment is"Home is Where". Stamped onto some "direct to paper" treated card I've teamed the designs with papers from the Perfect Prints paper pads, "Vivid Dots" & "Fruit Dots". I've just added some Stickles to give the butterflies some delicate colour.To finish I've added some Candis & cut out a butterfly to act as the stopper.

 |
| Here's one I made earlier! This is one I made at home but also with an Inkylicious stamp set "Picture Perfect" & this time a triple easel.6, 4, & 2 inch card blanks. Here's a closer look at the individual pieces . |
 |
| Once again I've just used some Stickles to add some fresh spring colours to the trees & grasses. |

 |
| Here are the 2 finished designs, quite simple to make once you have the different sizes of the card blanks prepared. Of course the designs don't have to be square as long as the proportions of the smaller cards are correct. Join me next week when I will be making some bright fun designs by printing on materials & felt |
For the Men in Our Lives
I think most of us struggle when it comes to designing cards for our menfolk, it's usually cars, footie or golf right? Well here's a few ideas for those fellas (like Mr Frosty) who aren't really into any of those things & you get to use up some of those precious pieces of card which we all collect because they just might come in handy! The colour block technique which I've been using today at my Liberty Craft demo is easy to do especially if you're good at jigsaw puzzles! I've used coordinating colours from various Textura Cardstock paper pads.The sentiments come from JGCL574 Just Right For You.
 |
. |

Tone on Tone
Today at Liberty Craft I've been sticking to working with just one colour & tones thereof. I was using some the new stamps from Woodware from AD designs. I've been embossing & then giving a colour wash with Distress inks. Here's what I did.....
 |
| Here we have ADS101 Rose Corner which I have embossing with metallic red powder & coloured with Fired Brick, Pickled Raspberry & Barn Door. As always the paper comes from a Perfect Prints pad (Dusk) & the sentiment comes from JGS379 Everyday Verses. I've over stamped using ADS505 Shipped Script & added a few spots of Stickles. |
 |
| Another outing for ADS103 Butterfly Botanical which I have embossed with Frantage embossing powder Aged Wine. the Distress inks colour wash was Seedless Preserves, Shaded Lilac & Milled Lavender. I have over stamped using ADS503 Netting Background with Versafine Majestic Purple & again the background paper comes from Perfect Prints pad Dots Vivid. the sentiment also comes for Everyday Verses. Hope to see you next week when I will be looking at cards for our menfolk! |
Love is in the Air
The wedding season is upon us again so time to think of some appropriate designs. Today for my demo at Liberty Craft I have been working with just one stamp set FRS273 "Blooming Heart" by Francoise Read. I've given it 3 quite different looks as you'll see & the wedding words come from JGCL Our Special Day. Here's what I did:-
 |
| Embossed with Detail Gold powder with some punched flowers. Add some gold Stickles & Liquid Pearls. |
 |
| Embossed with white powder onto craft card & softly coloured with pencils. Embellished with paper flowers & pearls. |
 |
| This look was achieved by stamping with Brilliance black onto a piece of rock salt background & then just some touches of dark pink Stickles. |
Don't forget to join me next week when I shall be exploring "Tone on Tone".
Shaker Cards
It was great to be back at Liberty Craft after my hols this week & catch up with all the crafty ladies especially those who had been with Jan & I at our Spring Workshop event on 14th March. We all had a great day & don't forget that our next big workshop event will be on Saturday 17th October when we will have the lovely Jane Gill from Woodware with us.
Well this week I was creating Shaker Cards to make a gardening themed design & pink & pretty one.

 |
| The stamp I used here was JGS390 Bubble Bloom "Carol" stamped onto the acetate panel with Stazon. The shaker part was provided by the rock salt crystals which I saved when I did the salty backgrounds a few weeks ago. To finish I added some Candis to the front of the panel. |
 |
| Here I used JGS366 Marigolds which I printed onto card, coloured with pencils & as you can see I cut part of the aperture around the flowers for added interest.I printed the sentiment on the spotty papers on the card blank & added some seeds to do the shaking.
Next week I'll be looking at wedding & engagement designs as the wedding season will soon be upon us once more. Hope to see you then.
|
Bloomin' Marvellous
I've been doing a little flower arranging at Liberty Craft this morning with the lovely Stampendous stamps Build a Bouquet (CRS5074) which is such a versatile set.The individual stamps come with their own masks so really easy to arrange your own display. I've just used Sakura coloured pencils & of course the background papers you see come from one of the Perfect Prints sets & this one is called "Fresh" so pretty- had to have it!!The greetings come from Woodware's "Tiddlers" JWS021 Happy Mother's Day & JWS024 Easter Greetings.


All products are available from Liberty Craft & of course my design is on display there if you want to call in & see the real thing. I'm off on my hols now for the next 2 weeks so I'll be back at Liberty Craft on Thursday 2nd April when I shall be making Shaker cards. Bye for now!
Easter Designs
Gosh don't Thursday mornings come around quickly! Today at Liberty Craft I've been creating some Easter cards which I always enjoy as they just say "Spring" to me. Two very different designs today one very traditional & the other more fun & quirky. Below I have taken a simple wooden cross blank & embossed it with Stampendous Aged Gold embossing powder. The card blank has been covered with a piece from the Perfect Prints pads & the flowers were also punched from scraps of these papers- so versatile! The greeting is a Woodware "Tiddler" JWS024 Easter Greetings. I've added some dots of Liquid Pearls & Stickles to the centres of the flowers & a knot of ribbon to finish.

Here we have a set of stamps from Francoise Read FRS280 "No Spring Chicken". This isn't specifically an Easter set but it does lend itself to the theme very well . Paper pieced with the Perfect Prints papers again & I've used the same Tiddlers set for the greeting.
All products available from:-
Liberty Craft
33. Exeter Road
Exmouth EX8 1PT
01395 273238
libertycraft33@yahoo.co.uk

Join me next week when I shall be doing a spot of flower arranging with the new Stampendous set "Build a Bouquet"
Mother's Day
OK I'm very late posting my demo from last Thursday at Liberty Craft but I've been a bit busy celebrating my birthday! I only got one card done last week but quite a lot of work went into it so I think I'm forgiven. I used the new Jumbo cling set from Stampendous Build a Bouquet. This set has individual stamps so that you can arrange your own floral display. It also comes with masks which are very useful. I've stamped with black Brilliance & formed the hydrangeas first then cut them out.I water coloured the flowers with Pearlescent Sky Blue & Orchid Brilliance. I then stamped the bowl & the background leaves & attached the flowers with 3D foam pads. The greeting come from one of Woodware 's "Tiddlers" JWS021 Happy Mothers Day. After layering onto dark mauve card & attaching to the card blank I completely coated the bowl with Glossy Accents & added some black Stickles to the centres of the flowers..

There is a set of dies which go with the stamp set which will make perfect decoupage. I'll be using this set again in a few weeks time so watch this space!
ADS Designs
Happy Thursday everyone & demo day again at Liberty Craft.Today I've been using the new range of stamps from Aspects of Design by Woodware. The stamps I've used today are as follows:-
ADS506 Poppies
ADS103 Butterfly Botanical
ADS505 Shipping Script
 |
| Here I've stamped onto cream card with the poppy first & then over stamped with the script. I then coloured with Tombow pens & mounted onto a piece from the Perfect Print paper pad Vintage 2. The sentiment comes from the poppy set. |
 |
| Here we have the Butterfly Botanical with the Script stamp on the background of the card blank. Created simply in black & white & if you look closely you'll see that I've I've decoupaged the butterfly in acetate- this meant the dreaded Stazon!! But I think the end result was worth it! I've added some touches of silver Stickles just to make it pop. |

 |
| For my third card I've embossed the butterfly with Stampendous Aged Wine powder & the purple layer has been embossed with the script stamp & detail gold powder. |

That's all from me for today have a look at the new Aspects of Design stamps at www.woodware.co.uk.
All products available from:-
Liberty Craft
33 Exeter Road
Exmouth EX8 1PT
01395 273238
libertycraft33@yahoo.co.uk
Next week I'll be looking at Mother's Day bouquets!!
Paper Piecing
 |
| FRS277 Owl Love- perfect for Valentine's Day! I've used papers from the Perfect Prints paper pads which are great for this technique. |
 |
| Here we have FRS167 "Lion King" mounted onto a craft card blank |
 |
| Here we have JGS390 Bubble Bloom "Carol". I've stamped with Brilliance Moonlight White& used Candis to fill the "Bubbles". I used a white Sakura Gelly Roll pen for the leaves & the background paper came from the Perfect Prints paper pad "Dusk". I love the little sentiment which comes with the set. |
 |
| Here we have the same set given a completely different look with Sakura Stardust pens. |
 |
| The second set I have been using today is JGS392 Bubble Blooms "Michelle" Stamped onto blue card with Brilliance Graphite Black I have used a variety of Candis, buttons ,gems, Stickles & Liquid Pearls. I do love the sentiments which come with these sets. I have paper pieced the leaves. Valentine's Day
Today I have been thinking about Valentine's Day during my usual Thursday morning demo at Liberty Craft & a chance to use this lovely new stamp from Woodware's Francoise Read "Curly Love" (FRS273) which would be great for a variety of occasions- wedding, anniversary & Mother's Day too. I embossed with Detail gold powder onto black card & then painted with a variety of brilliance inkpads- Rocket Red Gold, Pearlescent Poppy & Cosmic Copper. I cut the heart out & I have attached it to a easel card. The pretty paper you can see as the background to the card is from the Perfect Prints paper pad "Dusk". I have embossed some small flowers from the stamp set for the stopper bar of the card & added some small felt flowers & some red & gold Stickles to just make the design pop. The sentiment comes from a peel off which has been coloured with a permanent marker.

Here's another look

Hope you can join me next week at Liberty Craft when I shall be using the new Bubble Bloom stamps from Woodware's Jane Gill- always popular & versatile. Hope to see you then.
I |

I've been covering "mechanical" cards at Liberty Craft this morning & in particular this "Kinetic" design crafted from a piece of A4 card. It looks complicated but is really quite easy to do. Below is a rough guide to how to achieve the base. I have used 2 Woodware stamps to decorate the panels of the card FRS319 Happy Tiles & FRS153 Happiness Is. Happy Tiles lends itself beautifully to this type of card as it has a lot of sections which can be cut out or od course you can use it as a whole as I did in a demo a few weeks ago. I have used a pretty scrapbook paper as a background layered onto some spring green card. I've coloured with my trusty Sakura pencils & to finish I've highlighted some areas i.e leaves, hearts, centres of flowers with Glossy Accents. the main sentiment is "Happiness Is" & the other little messages come from Happy Tiles.
Here's the plan!

Demo day at Liberty Craft and today I was using some of the new Spring stamps from Woodware .

Firstly I used FRS187 Wonderful Friend which I stamped onto a sheet from a Perfect Prints pad (Vintage 2). I coloured with Sakura pencils & the sentiment which you can see all down the right hand side of the card blank is one of the Woodware "Tiddlers" FRS910 Grey Skies.

This is the lovely "Periwinkle" (JGS368) set which I used just before Christmas. This has been white embossed onto craft card & coloured with Sakura Aquarel (water colour pencils)
I have used these as the colour is stronger on top of the craft card & I haven't activated the colour with water. The sentiment again is a Tiddler JWS03 Happy Birthday. Just finished off with some garden twine.

Lastly we have FRS165 Hello Birdie which I have stamped onto white card & coloured with pencils. Another Tiddler for the sentiment,"Grey Skies" again. The card blank itself was stamped with FRS227 Curly Stitched Background.I added some punched daisies & leaves & Stickles for the centres of the flowers.
Hi everyone nice to be back to my regular Thursday morning demo at Liberty Craft & this week I've been exploring different ways with embossing folders & using some of the new folders which Sarah has in stock now. Here's what I came up with.

A lovely row of beach huts to remind us that summer won't be that far away now. Simply embossed onto white card & sponged gently with some Versamagic inkpads. the sentiment comes from Woodware's FRS169 Little Messages.

Here again a summery theme with sail boats on the sea. I've used one of the rock salt backgrounds that you may remember me doing a few weeks before Christmas. After running through the embosser I've dusted some darker blue/grey ink over the raised areas to highlight the images. The sentiment comes from Woodware's JGCL575 Delightful Verse.

Lastly this gorgeous heart design which I was going to save for Valentine's Day but I got carried away! Simply used with some silver mirror card & mounted onto some black. I've added some white satin ribbon. some tiny diamantes & the sentiment again comes from Woodware's Delightful Verse.
Demo day at Liberty Craft & this week I was getting messy with creating backgrounds. I was using embossing, sponging, over printing, the Stampendous Creative Palette &....salt!! Here are 2 end results which I'll talk you through as we go.

Here I began with a piece of A4 flat white card & randomly embossed with detail gold powder all over the sheet. The stamp set I used for this design is JGS337 Leaves & Swirls. After embossing I sponged over the entire area using Versamagic chalk effect inkpads & finished by over stamping in a darker shade with a smaller stamp from the set. You end up with an entire sheet of beautiful background which you can cut up into smaller pieces or use as your entire design.

Now this is where the salt comes in!! Rock salt to be precise. Again take an A4 sheet & randomly fill with colours from a Tombow (or other water based pens) just scribble using the side of your pen however you want it to be i.e blocks, lines or dots of colour. When you're happy spritz liberally with water using a fine spray & all you colours with run into each other. Sprinkle with rock salt & leave to thoroughly dry over night. I always find when I do this that it's great to do several sheets while you're at it & then you have them to hand when you need them. When the sheets are dry rub off the salt but make sure you keep the rainbow coloured grains it as it's great for shaker cards!! You can see from my design above the effect that the salt has & it leaves some great patterns & effects. I find this type of look is great for stamping over the top of using a solid silhouette type stamp. I've used JGS273 "Grasses" which is one of my favourites. The card blank itself was given the Creative Palette treatment using acrylic paints.
It's demo morning at Liberty Craft & it's been great to finally leave Christmas designs behind & make some "Thank You" cards in anticipation of the gifts that Santa may bring! I've used a couple of the new Woodware stamps from Francoise Read & Jane Gill, stamping with Versafine Onyx Black & colouring with Sakura Aquarel (water colour) pencils.
 |
| JGS 368 Periwinkles & the background is FRS227 Curly Stitched Background |
.jpg) |
| FRS 165 Hello Birdie & the Thank you sentiment on each card are from JW017 Thank You |
Today I've been visiting Snowy Scenes with lots of glitz & glitter. I've used Snowy Village from Little Claire & Winter Cottage from Stampendous. here's what I did.
 |
| Stamped onto pale blue card & coloured with tombow pens. Cover with DSA sheet & sprinkle crystal glitter over the entire image. The sentiment is JWS028 Winter Wishes from Woodware. |
 |
| Next we have "Winter Cottage" from Stampendous. Embossed in white on pale blue card, add some crystal glitter & simply mounted onto an ivory Centura pearl A5 card. The sentiment is from JGCL562 Christmas Greetings from Woodware |
 |
| Lastly I've embossed with silver onto silver pearl card. I've painted with Brilliance |
Carrying on the Woodware blog theme today here are the designs I created at Liberty Craft last Thursday using the same Stampendous snowmen stamp but 2 different looks. Take a look!
 |
| Here I've made an easel card using Stampendous CRP235 Snowman Friends some punches snowflakes & the sentiment comes from JGCL 562 Christmas Greetings. |
 |
| I've been a bit tricky here!! I've cut off the end snowman & tucked him behind his friends to create a totally different look. The image is mounted onto a panel of acetate behind which is a piece of embossed card which has had some gilding wax applied. I've coloured with pencils for both cards but kept the colours more pastel this time. Someone suggested that they may be snowgirls! |
Here's another view

Christmas with "Little Claire"
Gosh doesn't Thursday come around quickly?! This week I was using some of the cute Little Claire stamps with various techniques, embossing folders & gilding wax.
 |
| Here I've used Distress inks to brayer the background,coloured George with Promarkers & added some Chunky white embossing powder for the snowy effect. The embossed panel has been given a gorgeous pearly effect with Creative Expressions "Pearl Moon" gilding wax. |
 |
| Here's George again with a little decoupaging & sparkly snowdrops with the aid of some Stickles. |
 | ||||||
| Lastly we have "Snowy Village" which has been stamped onto pale blue card & coloured with pencils. Add some Chunky White for a snowy effect. Just One Colour
For this week's demo at Liberty Craft I was using some of the new Christmas stamps from Woodware & choosing to work in just one colour. This is a technique which I really like although I have to admit my favourite combination is black & white- very elegant! It's also very useful if, like me, you have difficulty in deciding what colour combinations to use sometimes. Believe me I can agonise for hours!
Here's the results!
|


Colours of Autumn
It was great to be back at Liberty Craft today for my Thursday morning demo & the theme this week was "Colours of Autumn" There are some lovely leafy, autumnal stamps from Woodware & I was embossing, using Distress inks & colouring with Promarkers.
 |
| FRS254 "Curly Leaves" with Promarkers |
 |
| JGS304 "Kim's Coppice" embossed with copper powder |
 |
| Kim's Coppice again this time randomly embossed with gold & red powders |
 |
| JGS273 "Wheat"- Direct to paper technique with Distress pads |
Christmas is coming
It was time to get Christmas crafty at Liberty Craft today I was using some of the new Christmas stamps from Stampendous. Below you'll see the beautiful "Christmas Cottage" which I think will rival "Snowy Postcard" which was the Stampendous "must have" of a few years ago. It has beautiful detail & is a joy to colour. I've stamped using Versafine & coloured with Sakura pencils. A little decoupage of the holly & leaves, a touch of Diamond Stickles & some Glossy Accents on the holly. The fir boughs on the card blank come from last year's Jumbo "Forest Friend" & the sentiment is Jane Gill's "Christmas Greetings" . There's lots more ideas to come using Christmas Cottage both in demo & on my blog craftydebs so keep looking!

Here we have one of the HouseMouse stamps from Stampendous "Friendly Dreams"- aren't they cute? Again stamped with Versafine & coloured with pencils. This stamp could be used all year round with careful camouflage of the bauble just right for any cat lover.


I
Marigolds & Poppies
Thursday is demo day at Liberty Craft & this morning I've been using some lovely floral stamps from Woodware in conjuction with Tombow pens, scrapbook papers & Brilliance inkpads.
 |
| Marigolds from Jane Gill (JGS366) I have coloured with Tombow pens & decoupaged the marigold flowers. |

Field of Poppies by Francoise Read (FRS228)

For the first card I've paper pieced some scrapbook papers & printed the entire design onto a scrapbook paper.
For the second design I have stamped onto cream card & water coloured using Brilliance inkpads.
I had great fun at Liberty Craft yesterday morning creating these cute children's cards from the new Woodware stamps by Francoise Read. I used Promarkers for colouring, they are just great with their bold colours & very easy to colour with. For the "Cheeky Turtle" which you see below I mounted him on a die cut circle which had been folded in half to form a rocker card. I also used Glossy Accents on the eyes of all the animals & the turtles toes.


 |
| "Hoppy Birthday" frog was mounted on a "Wobbler" to make him spring & wobble just add some Card Candi & pretty scrapbook paper |
 |
| "Patch Elephant" was also given a Wobbler & some Stickles for a little bit of sparkle. Great for paper piecing & baby cards. |
 |
| Finally we have "Lion King" & isn't he cute on his Wobbler? I just love the paw prints & all the sentiments which are included with all the stamp sets. All in stock now at Liberty Craft 33 Exeter Road (opposite the library) Exmouth EX8 1PT 01395 273328 libertycraft33@yahoo.co.uk |
Morning everyone! I had a great first demo at Liberty Craft yesterday & it was lovely to see so many familiar faces- thanks for making me feel so welcome.
My theme for the day was "Words, flowers & frames" I was using one of the lovely Spellbinders frame sets which are on offer at Liberty Craft at the moment at an amazing 20% off, a great offer & too good to miss! I also used "Tattered Flowers" die set by Tim Holtz & some lovely sentiments from Woodware. All the direct to paper technique sponging was done with a selection of Tim Holtz Distress Inkpads. Here's a look at the results.
 |


 |
No comments:
Post a Comment